Welcome!
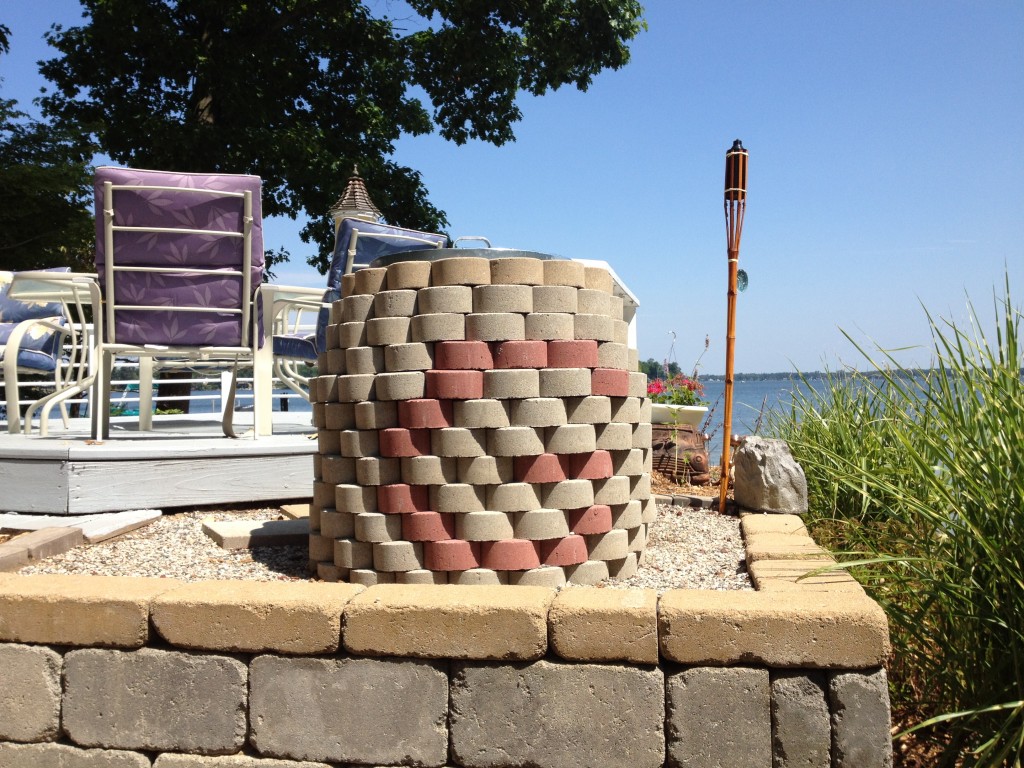
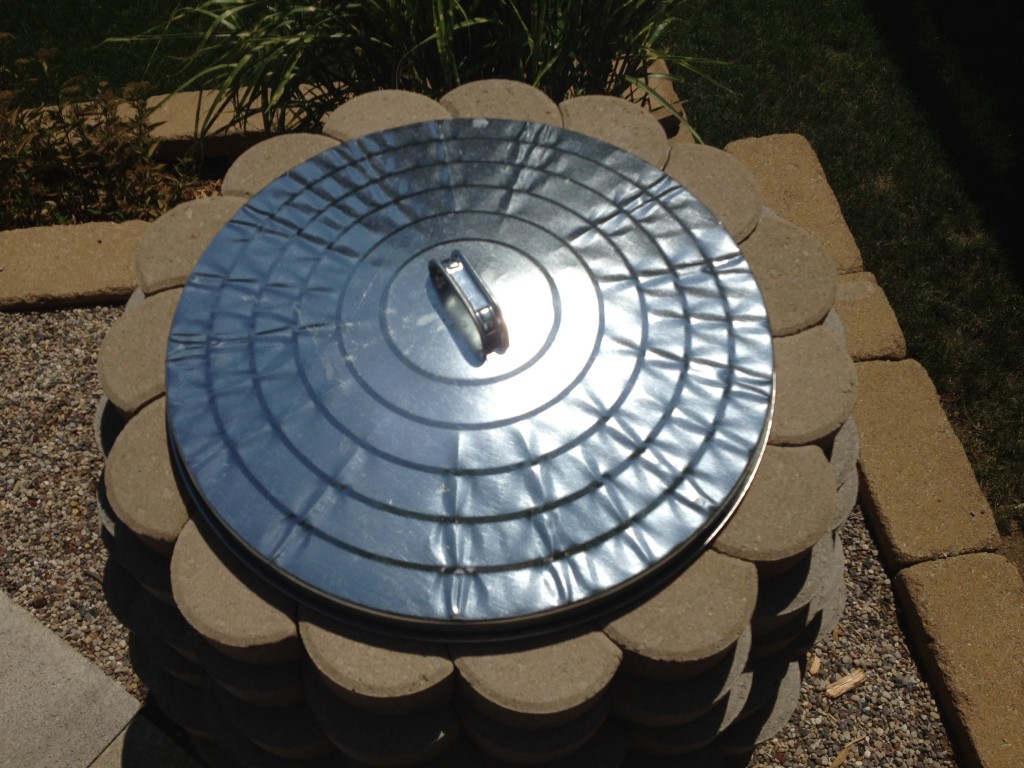
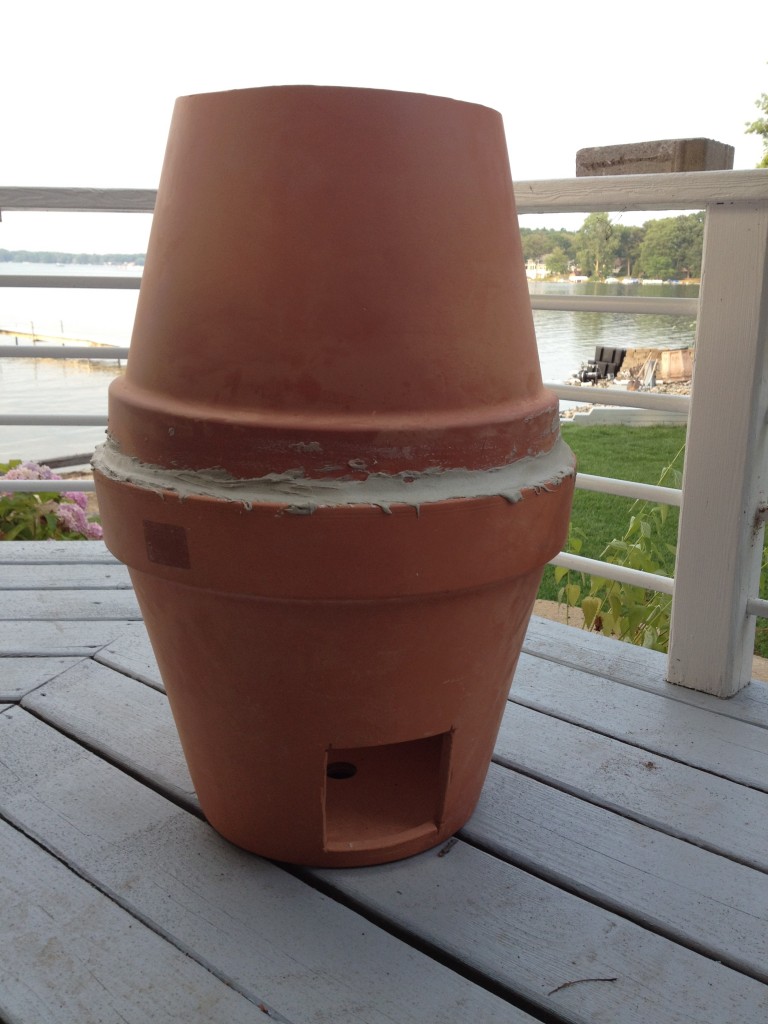
After tens of hours of research by multiple family members, my family recently built what you see below: an authentic tandoor purely from ingredients at your local Lowe’s/ Home Depot/ Regional Equivalent. Our favorite parts? It cooks like an authentic tandoor, and it was less than $200!
This post will go over exactly how you can build your own.
—-
Tandoor Building Stats
TOTAL TIME: 1 Week, 2-3 hrs/ day
DIFFICULTY: For the experienced, or confident, DIY-er
—-
We had a diverse set of goals in building our tandoor:
- Sufficient Temperature: it turns out that yogurt based marinades acquire a distinct flavor when cooked at 850 degrees, the traditional temperature of Tandoors. Therefore, we wanted to ensure that our Tandoor could consistently reach the desired heat.
- Authenticity: the authentic flavor arises from the use of charcoal and all clay.
- Safety: materials many DIY-ers tend to rely on to build Tandoors are hazardous. Galvanized metal releases fumes at the temperatures we wanted, and even insulation surrounding the clay pots can be toxic to sniff. We wanted to stay away from any potential toxins.
- Easy to Purchase Parts: we did not want to have to wait for an online order, and we wanted to minimize our trips to stores around town.
- Cheap: we found $500 for a 14″ pre-built tandoor to be quite ridiculous, but love the flavor of Tandoori Bread and Meat.
So, here is how to replicate our process. We think we met all five goals. A good starting point is the shopping list:
— 2 Terra Cotta Pots that fit together when the bigger is standing up and the other is flipped to fit in and make a hexagon shape. We chose the biggest combination we could find, 20″ and 18,” because we planned to use the Tandoor at many gatherings, family dinners, and parties. We found that any pots 2″ apart worked: 18″ and 16″, 16″ and 14″, etc. Pick a size based on the size of the Tandoor you want [fourth to last image below provides clarification of the hexagonal fitting if you do not understand].
— Box of Fire Bricks, which are not typically sold near the rest of the bricks, but instead in the area where high-heat adhesives and other equipment for wood-fired ovens is.
— A great deal of high-temp mortar, located next to the fire bricks likely. Ours was even by the same brand.
— Bricks for the outside of your structure. You can actually make a square or a circular structure:
- If you prefer to make a square structure, any old brick will do. And you should just calculate based on the size of the brick, leaving 3″ minimum on all sides for insulation, and the height of the pot how many bricks you will need.
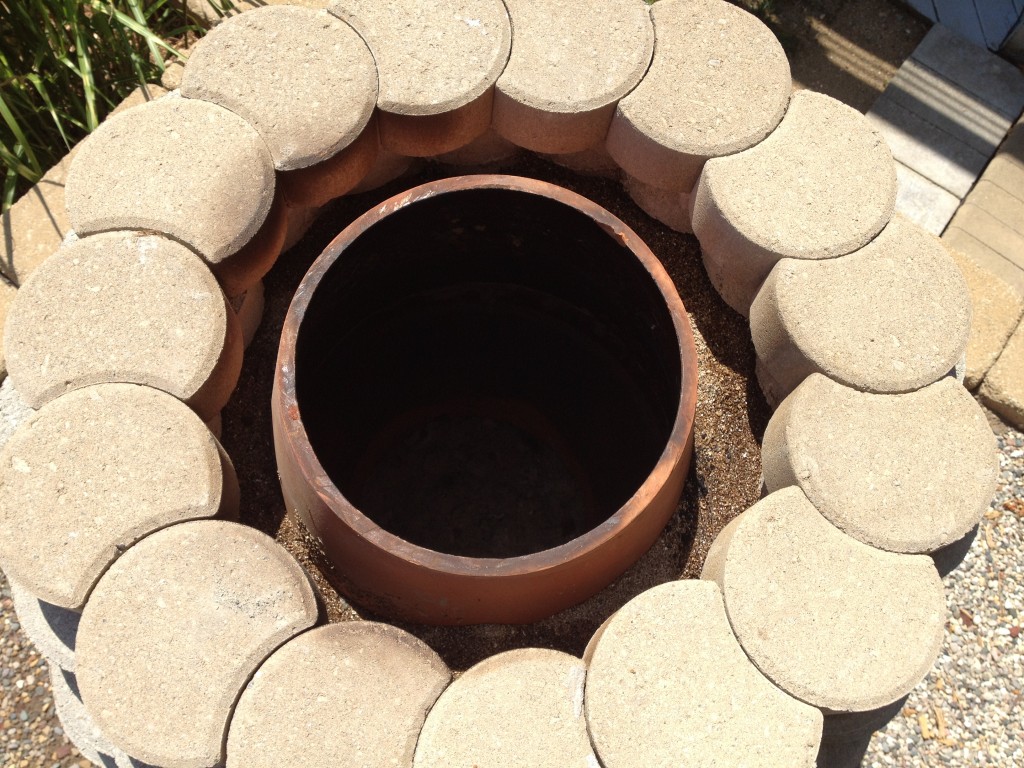
- We personally preferred a circular structure, because we felt it would help with getting the breads on the side and giving it the authentic look. Perform a similar calculation as described for the square bricks, except 100% actually lay out the brick and see how many you would need around the bigger pot with 3″ space for insulation [recommended for square as well, but not necessary] then take into account the height of the pots put together.
- Consider colors. As you can see, we made a custom G for Gupta, Gagan, and Geeta, and we included a top tan layer to match our existing supporting wall. So you can buy certain numbers of certain colors of bricks for custom designs.
— Masonry blade for angle grinder, and metal blade (it it does not come with the grinder – it does with most).
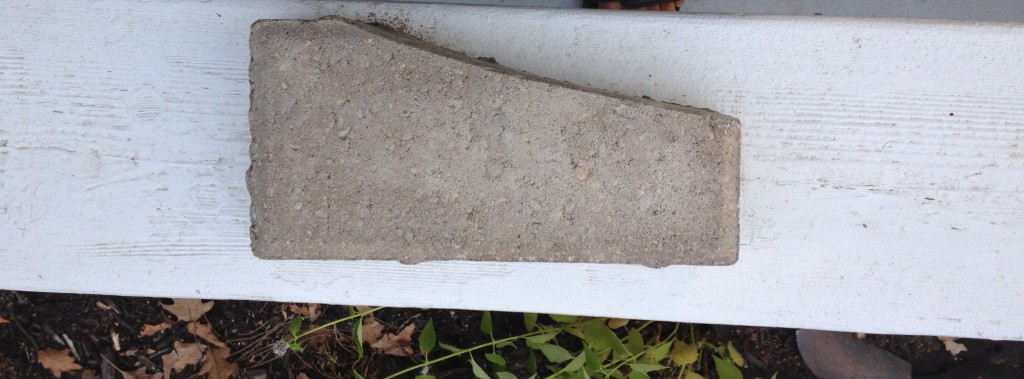
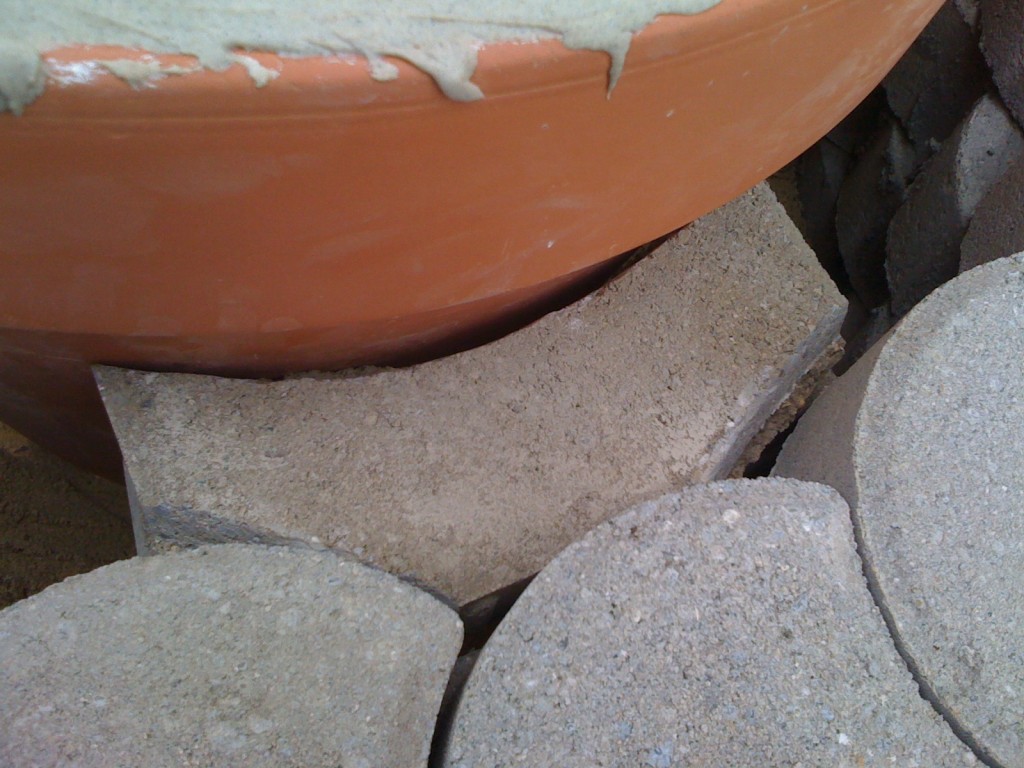
— Thin, relatively large bricks. You will be cutting these with an angle grinder to help the ventilation gate. Example of the cut brick below — it was in fact just a broken brick we found laying around Home Depot. It was about an inch thick, so sturdy enough to hold the roof of the ventilation gate’s tunnel, but not too thick to make cutting it tedious.
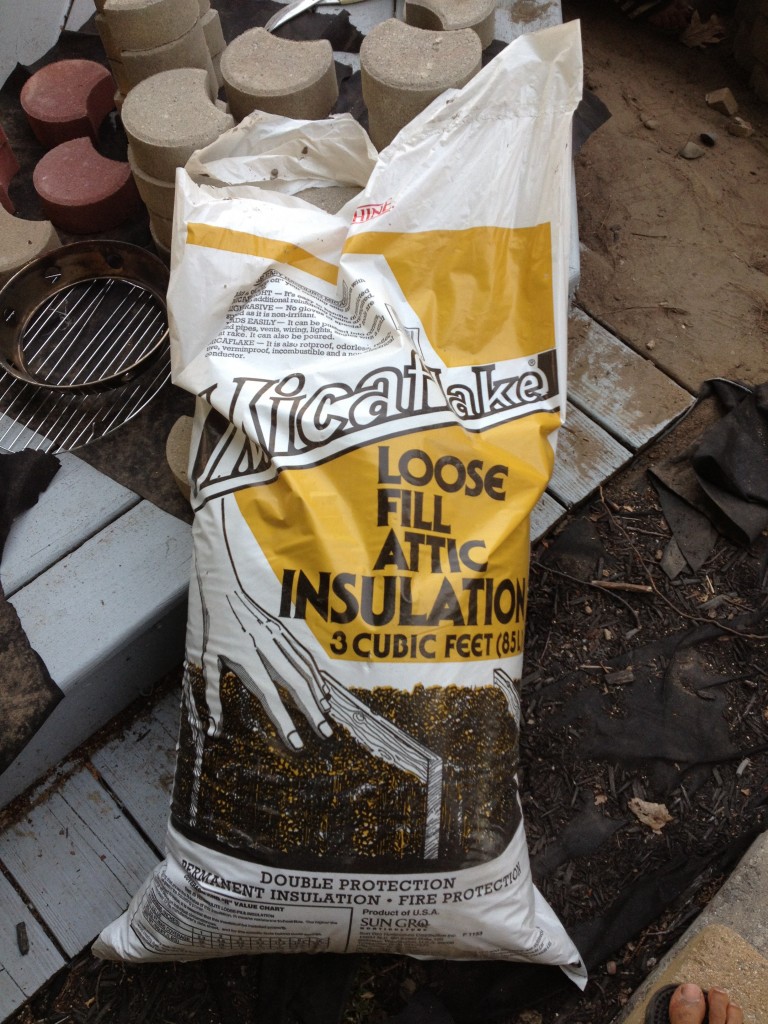
— Pellet Vermiculite Insulation. It’s a triple threat: improves safety by keeping the outside brick cool, retains the heat so you use less coal, and helps the Tandoor heat up faster.
— Bag of concrete mix.
— Some sort of lid. We use a trash can’s. This helps keep most water off the insulation and clay.
1. The Base.
You do not want to set dry, hot ground on fire: Safety! So, the goal of our base will be to create a safe, heat-proof base upon which to build the Tandoor.
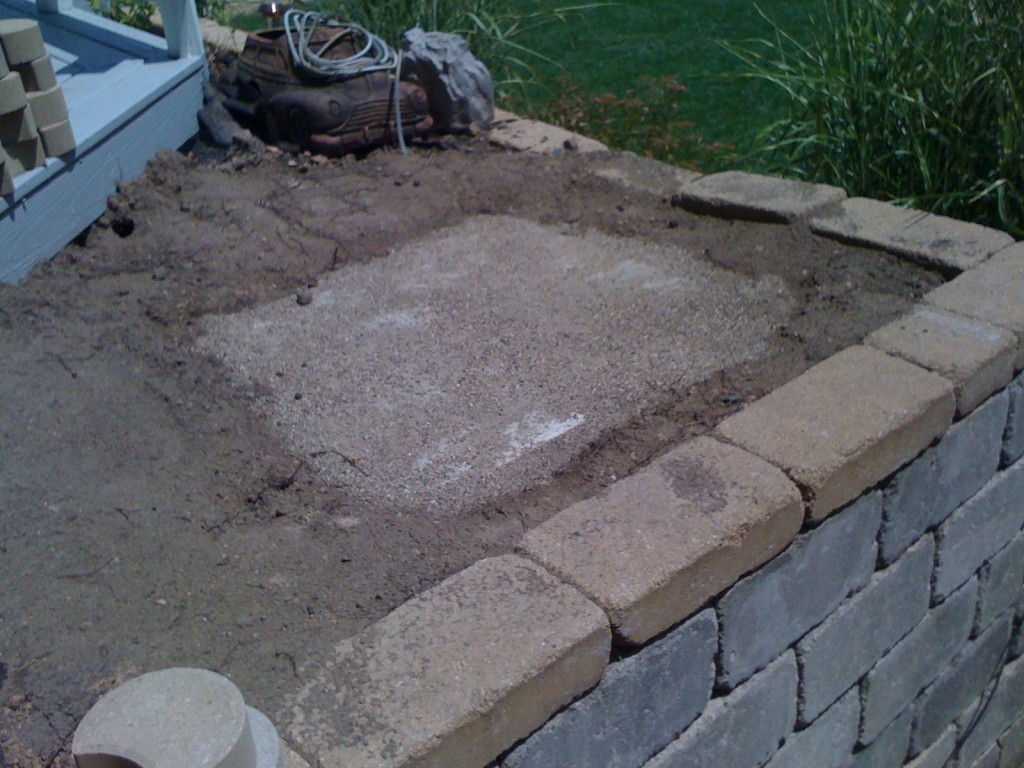
To achieve this goal, you will want to dig out a square area where you want to place the tandoor and lay down a layer of concrete. If you have not done this before, it is actually as easy digging a square hole, potentially laying down wood pieces around the edge – we did not – pouring a sandy like bag in, and mixing with water. You then continue to water down the concrete every now and again, letting it sit for at least 24 hours.
How do you know how big to make the base? The diameter of the base of your bigger pot + 6 inches + the thickness of the bricks you choose + 6 inches extra should be the side length of the square base.
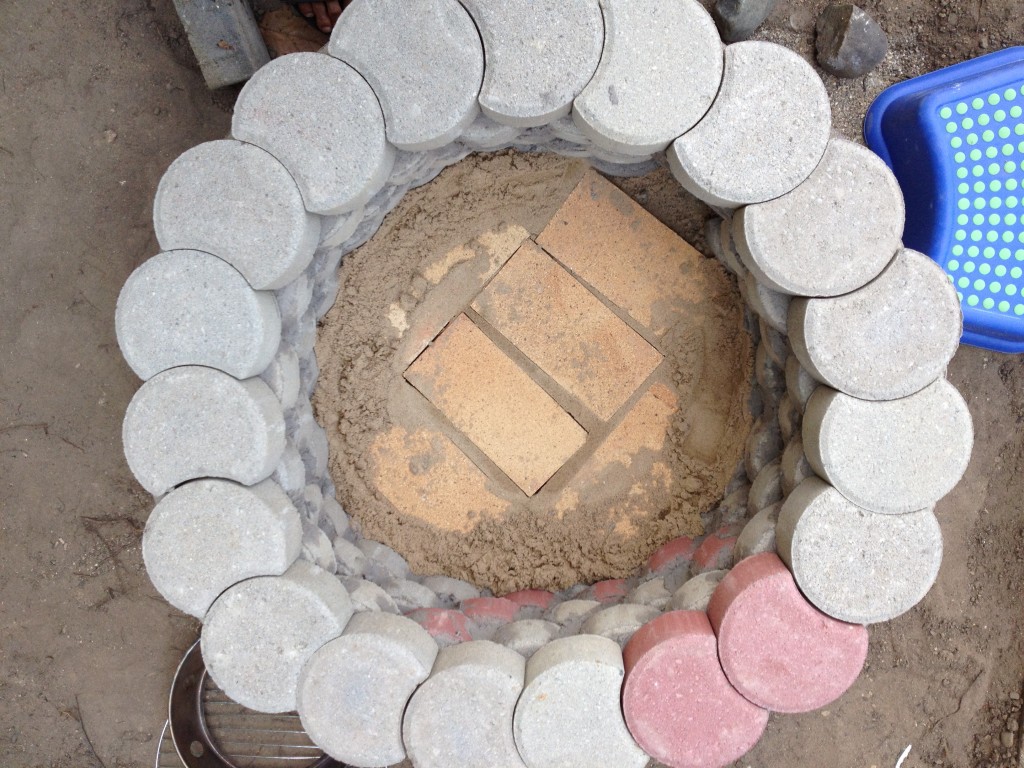
Now, on top of the concrete we will lay a layer of fire brick, ensuring the cement or clay on top of it doesn’t crack. To do so, lay out the first layer of your brick outer structure, place as many fire bricks in as you can, and then filled all the gaps with sand as shown below.
The base is then complete!
2. The Tandoor Pot
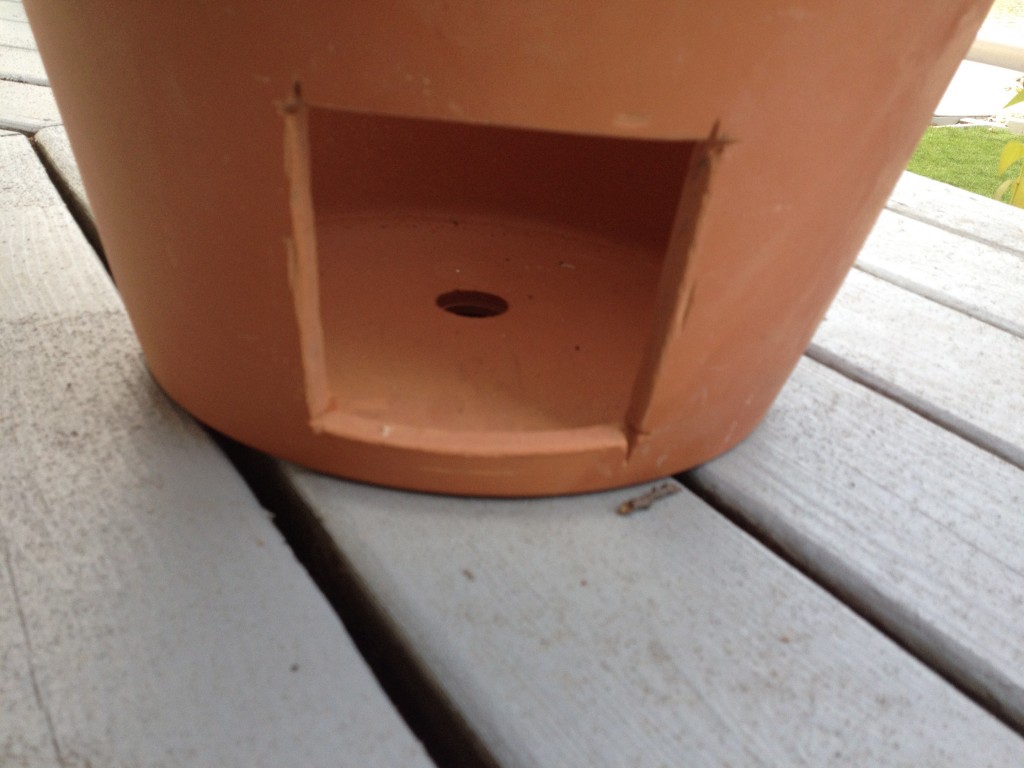
The key to a Tandoor getting to a high temperature quickly is having good air flow. One achieves this by building an appropriate door into the bottom, bigger terra cotta pot. To do this, you will need an angle grinder fitted with a masonry blade, gloves, and protective eyeglasses.
Draw out a decently large shaped square just above the bottom rim of the pot (the part it could be impossible to cut something out of because it is the base). Be aware that making too large a door could hurt the structural integrity of the pot. Our door is shown below; it is about a 4 inch side length square, almost cut too close to the bottom rim – it is quite thick, so get up high.
But before taking the angle grinder to it, now shift your attention to the smaller pot. You want to get practice using the angle grinder by making the easier cut we need to make on this smaller pot. We need to have an opening for the top of our Tandoor, so you need to cut the bottom of the pot off with the angle grinder. Use a pencil to draw a straight line 1.5 inches below the bottom of the pot, and use the angle grinder to slowly cut the bottom off. Be sure to place your terra cotta pot face down in grass so that it is stable. The angle grinder is very dangerous.
Once you have cut the base, you can cut the door as well. We used diamond-tipped concrete drill bits to drill holes at the four corners to eliminate the amount of pressure put on the pots, but it seems the pots would have withstood the pressure of the angle grinder had we not drilled the holes.
After both cuts have been made, carefully fit the smaller pot into the bigger pot upside down. [Before placing the smaller pot into the bigger pot, we actually used the angle grinder to the round the edges on the smaller pot. In hindsight, this actually released some of the tightness of the fit and is not recommended. However, if you have any concerns about the sharp edges, rounded edges do work perfectly well as long as you are generous with your mortar.] Then, apply mortar all along the joint of the two pots. You will want to wear a disposable glove to apply a thick layer of mortar on the inside in addition to the outside.
You will then want to wait as long as it takes for your mortar to solidify; for us, this was around 48 hours. As you can see, we peeled off any stickers because we did not want to be smelling those fumes once the tandoor reached 850 degrees!
3. The Final Structure
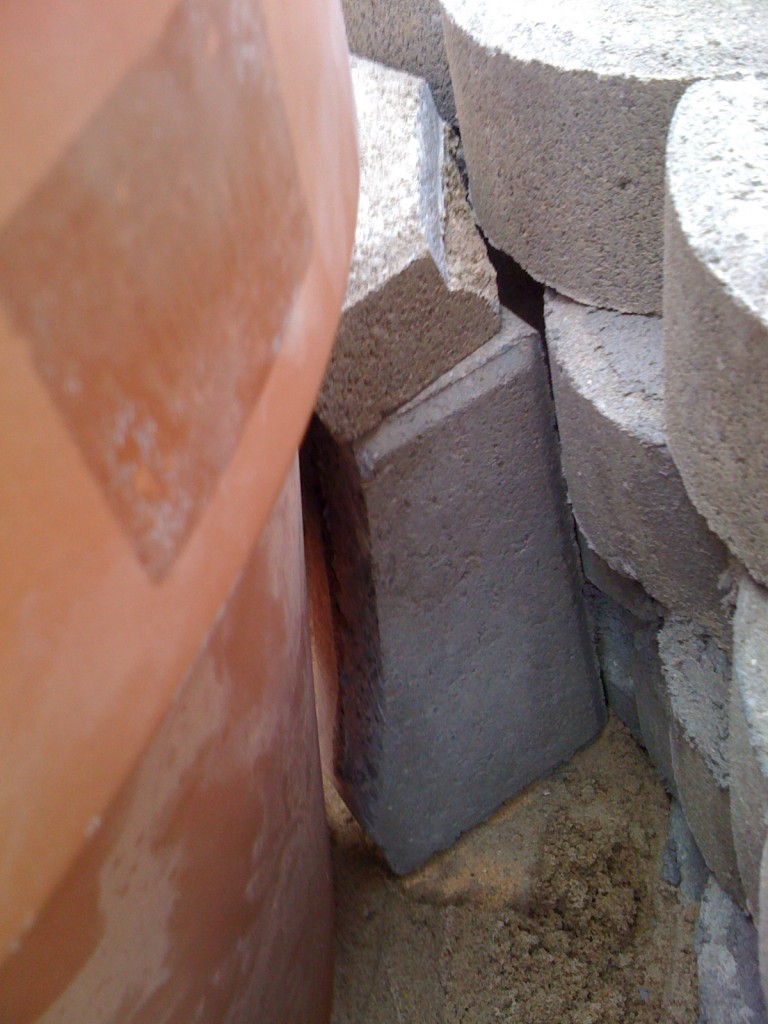
There is one final difficult task in our quest to build a Tandoor: building the tunnel for the ventilation gate. From the shopping list, you might be able to guess what we are using: thin, relatively large bricks. You will be using the angle grinder to cut these. Unlike with the clay, you can expect sparks in this process. Be sure to don complete pants and shirt. We shaped the top brick rounded to fit perfectly as following:
Then we shaped the sides as well:
We filled in any remaining holes or gaps with a healthy dose of mortar.
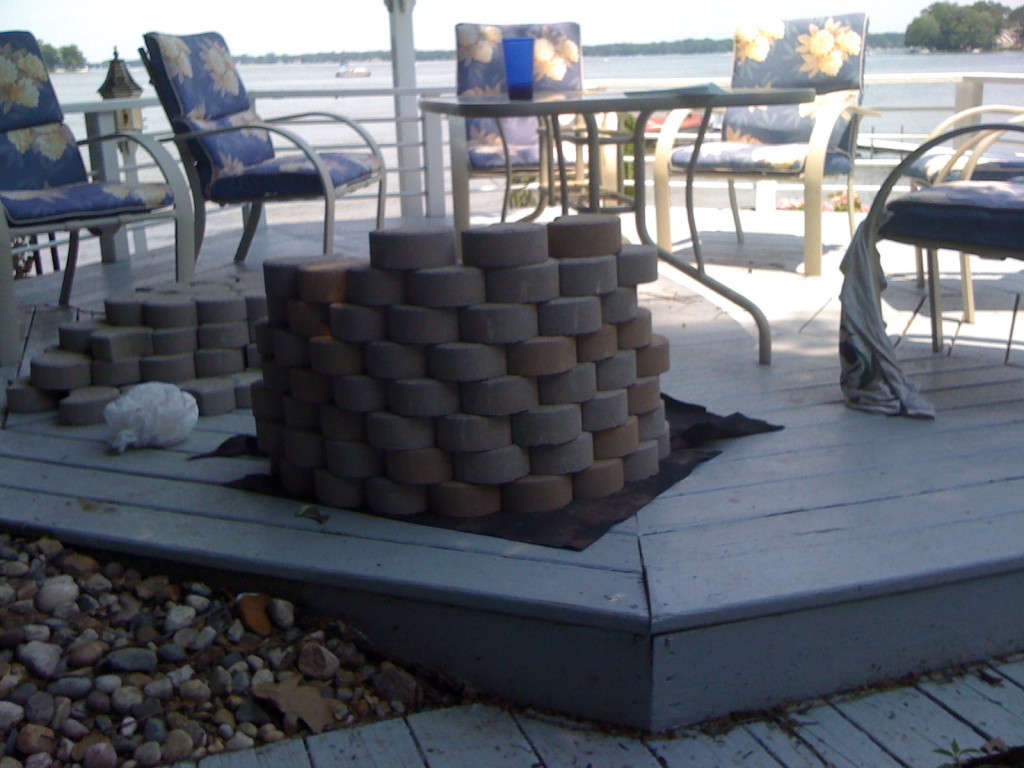
From there you lay out the bricks you have for the outside structure. Do notice that in the above pictures, we already have several of those up to see the cuts we would need to make on the bricks. This time, we need to set them down with mortar. What we did is lay down a layer – the circular bricks are very tight fitting – and then put a thin layer of mortar in the inside portion of every brick joint, as well as a thin layer of mortar on the inner half of the bricks, such that no mortar we seep out to the outside. Then we would lay the next layer on top.
The final step is to let it dry, and then fill with insulation. Then, you can equip your Tandoor with a thermometer if you wish, and you are ready to fire it up.
4. Guidelines for Great Tandoori Cooking
The most important thing to do for great Tandoori cooking is to use authentic recipes and spices. This is even more important than temperature.
But the next most important thing is what most DIY-buffs have been mentioning: get a temperature gun, and run the coal for the 1.5 hours needed (and multiple loads) to get the Tandoor up in the 750-850 degree range. This is when those yogurt marinades your authentic recipes provide really come to full flavor. Your bread also cooks fast enough that it is really easy to get off the sides.
So, happy cooking! We love our Tandoor.
30 replies on “Backyard Tandoor: The Authentic, Easy Way”
My thanks for taking the time to post this process. This will be my next project. (Just finished building a rocket stove/heater to warm up my garage) We absolutely love Tandoori and have wanted to have an a Tandoor oven for a long long time. Your point about using authentic ingredients is well taken. Thanks again.
Great to hear Mike! Would love to hear how it goes! Cheers and happy cooking.
Akash Sahib. How did you slice the pot off the bottom? Dhanyavad
Use angle grinder /cutter with disc blade attachment
Where do you add the coal, do you keep the grill at the bottom or push the coal through the opening?
Do we need to cover the square opening? If not covered wont it lead to loss of heat?
Hi Aakash looks like you have had great success with your homebuilt tandoor. You must have much experience with problems you may have had. I have recently made a tandoor oven. It fires brilliantly but I cant seem to get my naan to come off the sides. it sticks far too much. Whilst cleaning with a damp cloth i noticed that the pot really absorbs all the mositure almost instantly. Do you think this may be a reason why my naan sticks too much. The temperature is perfect at approximately 400 Celcius. Is there anyway I can upload pictures to show you?
This project seems like a lot of fun to construct and use. How hard is it to clean the ashes from the bottom? Do you remove most of it from the top or sweep it through the air intake at the bottom?
It’s not bad at all – we’ve done both – throw a broom down or use a garden shovel by hand through the opening
Thanks a lot Aakash – this is by far the best design and most clear and concise instructions I have been able to find on the internet for DIY tandoor making.
Will definitely be trying this out in the summer months. Might try utilising the bottom of the smaller terracotta pot as part of the lid for the tandoor as an added touch.
Best of luck with the future, and God bless.
Did you season your pot in any manner? And if so, what did you use? Thanks.
the garden pots are FULL of toxic crap you can ever find.. keep in mind POTS need to be cheap so people will buy, that is not going to happen with organic material occurring naturally without any additive…
forkblade brings up a point that is important – avoid pots with any crap with them! TALK to the person at the store to make sure it’s just a regular clay pot
hey mike we’ve tried a variety of seasonings! it’s really an art and part of the fun, thanks for bringing it up
here’s a great article on what you can start out with, jumping straight into the authentic stuff 🙂 http://www.washingtonpost.com/wp-dyn/articles/A36402-2005Mar15.html
Amazing post. I have just fired up my tandoor with instructions above. Unfortunatily I see 2 cracks already on the bottom. I used terra cotta pots. Can you adivse if I did need to do something?
I think I can still save it by patching the minor cracks. I fired it up before putting the insulation just to test it. Perhaps thats the reason? Not sure. any advise would be great.
Farhan
ansari_farhan@hotmail.com
Its my again guys. Unfortunately my terra cotta gave up on me when I went up to 600F. I used 20″ on top and 20″ on bottom. I had to grind the top of one 20″ to fit in to the other. There were some minor cracks at 300F but it just cracked wide open at 600F.
I would like to hear your experience with high temperature. Now I’m thinking of using some other cylinder that I can clay myself in that can resist high heat. Any suggestions?
Farhan
I find this to be a clear and concise method, apart from my confusion about the vent and how and where the bricks lie in relation to the outer wall. My understanding is that you’ve just surrounded the little door on the big pot with 3 bricks and there’s no hole in the outer wall for it to breathe. I was kind of hoping you might either provide a picture of how it looks, or a detailed verbal instruction. Thanks very much! 🙂
Hi Aakash,
Thanks for this post. How can we make sure that the pot is a regular clay pot.
Also what if I made a shell out of Cement and not a clay pot, would cement be alright as the inside of the oven
Be sure that the terra cotta is NOT from Mexico. Because of lead in the clay, occurs naturally. If the store doesn’t know where they come from, get a testing kit for lead content and check a single pot BEFORE buying exactly what you need.
OR… buy terra cotta/earthernware pots from a local potter who makes plant pots, if your local clay is safe.
very good idea
This may seem like a silly question, but I’m assuming that the coals go in the bottom and that between the two pots there is a metal grill grate of some sort to put pots on? Or do you just put meat and veg on skewers and hang into the pot? Thanks! My husband and I are moving into a new house and are wanting to build a tandoor; your blog post is VERY detailed and helpful.
I noticed the red G nice touch!
Do you have to worry about it getting wet in the rain?
Are you wondering where to source vermiculite and flowerpots in Australia ? Here is an itemised list of what and where to buy DIY tandoor supplies in Australia ( Bunnings and Petbarn)
https://isthiseverything.wordpress.com/
can you please post a picture of how the bottom side opening looks from the outside?
This is a very nice presentation. Many thanks
Hello Aakash, thank you for these beautiful instructions! I built my own tandoor recently inspired by your post. Any tips on:
1. Getting the temperature up to 800 degrees: I could only get mine up to 400 on our first fire.
2. How to avoid getting cracks in the terra cotta pot. On our second fire, it slightly cracked and I wonder if you have to bring up the temperature slowly?
In your design, since the coals sit inside the clay pot, were the fire bricks necessary?
Would you recommend cutting the bottom off the bottom clay pot? That way the coal sit on the fire bricks
Also a few years in, have you experienced any cracking?
Hi Akash, I’m not sure if you still monitor this but I’ve been trying to build my own tandoor and unfortunately my pot cracked. Could you follow me on Twitter or Instagram @Talal916 so I can ask you a few questions? Thanks!
@Aakash, thanks for this blog post. Can we use 22 and 18” pots?